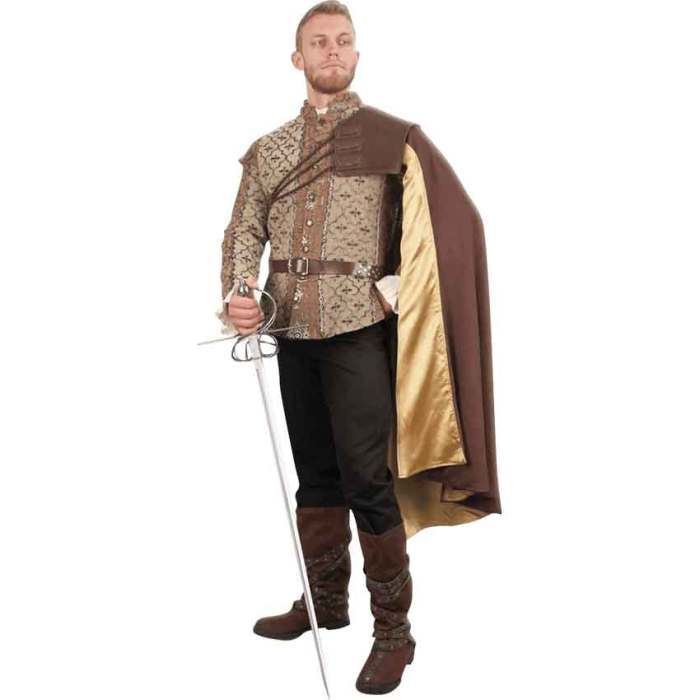
Renaissance Festival Mens Costumes: Step into a world of vibrant fabrics, intricate details, and historical accuracy. This isn’t just about dressing up; it’s about embodying a character, a time, a story. We’ll delve into the nuances of crafting authentic costumes, from the nobleman’s opulent velvet to the peasant’s humble linen, exploring the historical context and practical steps to bring your vision to life.
Whether you’re aiming for historical accuracy or a fantastical interpretation, this guide provides the knowledge and inspiration to create a truly memorable Renaissance Festival experience.
From understanding the stylistic differences between a nobleman, merchant, and peasant’s attire to mastering the art of constructing a doublet, hose, and hat, we’ll cover everything you need. We’ll also explore the evolution of key costume elements across different Renaissance periods and examine the accuracy (or lack thereof) of popular costume choices like pirates, knights, and jesters. Get ready to transform yourself into a character worthy of the Renaissance!
Creating a Renaissance Festival Men’s Costume: Renaissance Festival Mens Costumes

Crafting a historically-inspired Renaissance Festival costume can be a rewarding experience, allowing for creativity and a deep dive into a fascinating era. This guide provides a practical approach to constructing key elements of a men’s costume, focusing on achievable techniques and readily available materials. Remember, accuracy isn’t always paramount; the goal is to capture the essence of the style.
Doublet Construction: A Step-by-Step Guide
Creating a doublet, a staple of Renaissance men’s fashion, involves several steps. This process can be simplified by using pre-made patterns or adapting existing clothing patterns. Careful attention to detail will yield a more authentic result.
| Step | Materials | Process | Potential Challenges |
|---|---|---|---|
| 1. Pattern Selection | Pattern (commercial or drafted), tracing paper, fabric shears | Choose a pattern appropriate for your skill level. Trace the pattern onto fabric, adding seam allowances. | Finding a pattern that fits your body type and desired style. |
| 2. Fabric Cutting | Chosen fabric (linen, wool, or a suitable blend), pins, rotary cutter (optional) | Cut out all pattern pieces carefully, paying attention to grainlines and notches. | Working with potentially difficult fabrics like heavy wool. |
| 3. Construction | Sewing machine or needle and thread, interfacing (optional), tailor’s chalk | Construct the doublet according to the pattern instructions. Pay close attention to details like the lacing holes and lining. | Precise alignment of seams and accurate construction of the sleeves. |
| 4. Finishing | Lacing cord, buttons (optional), decorative trim (optional) | Add lacing, buttons, and any decorative trim. Press seams to create a crisp finish. | Achieving a clean and even finish on the lacing holes. |
Recommended fabrics include linen for a lighter, more summery doublet, or wool for a warmer, more substantial garment. A blend of linen and cotton can offer a good compromise.
Constructing Renaissance-Style Hose
Historically accurate hose were typically made from multiple pieces of fabric, carefully shaped and sewn together. While modern methods can simplify the process, understanding the historical construction provides a richer understanding of the garment.
Here are the steps involved in constructing a pair of Renaissance-style hose:
- Pattern Drafting or Adaptation: Start by creating or adapting a pattern that allows for the shaping of the leg. Consider using existing trouser patterns as a base.
- Fabric Selection: Choose a sturdy, draping fabric like linen or wool. Consider the weight and drape of the fabric for comfort and authenticity.
- Cutting and Sewing: Cut out the pattern pieces, ensuring accurate grainlines and seam allowances. Sew the pieces together, paying attention to shaping and curves.
- Seams and Finishing: Finish seams with a neat stitch, such as a French seam, to prevent fraying. Press seams carefully to create a clean finish.
- Adding a Waistband: Attach a waistband made from the same fabric or a contrasting material. This waistband may be laced or buttoned.
- Optional Details: Consider adding decorative elements such as embroidery or contrasting fabrics for added visual interest.
Renaissance Hat Construction: Five Methods, Renaissance Festival Mens Costumes
Renaissance hats varied widely in style, offering a range of options for costume creation. These methods demonstrate various levels of complexity, allowing for adaptation to different skill levels.
Five methods for creating a simple Renaissance-era hat are detailed below:
- The Simple Cap: Cut a circle of fabric (linen or felt), add a drawstring, and gather it to fit the head. This requires minimal sewing skills.
- The Slouch Hat: Use a larger circle of fabric, gather it slightly at the top, and add a brim by creating a second, larger circle and attaching it. This method is slightly more advanced.
- The Cloche Hat: Create a close-fitting hat with a rounded crown by using a pattern to cut and sew the fabric sections together. This requires more advanced sewing skills.
- The Tricorne Hat: This more complex hat requires a pattern and involves shaping three corners of the brim. It demands experience in millinery techniques.
- The Bonnet: A simple bonnet can be made using a pattern, and usually involves a crown and a brim. The fabric can be decorated with ribbons or lace.
Crafting the perfect Renaissance Festival men’s costume is a journey of discovery, blending historical research with creative expression. By understanding the social contexts and construction techniques of the era, you can create a costume that is both visually stunning and historically informed. This guide has equipped you with the knowledge and skills to build a costume that not only looks the part but also tells a story, allowing you to fully immerse yourself in the magic of the Renaissance Festival.
Remember, the details matter – from the carefully chosen fabrics and embellishments to the perfectly fitted accessories. So, embrace the process, experiment with different techniques, and most importantly, have fun bringing your Renaissance character to life!